Tuesday, December 31, 2013

Koehler Escoffier

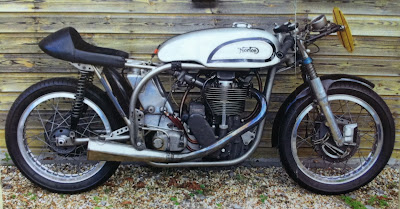
France isn't the first country that comes to most people's minds when thinking of vintage motorcycles, but the Koehler Escoffier is certainly a machine with great beauty. I won't pretend to know much about this motorcycle, nor do I know anyone that does. But I've saved a few photos of it over the years, and I think they're certainly worth sharing.


I imagine that not many of these bikes were made, and they're surely worth a fair bit of money. It's a great looking V Twin motor with a sleek presence and some very interesting features. It reminds me of a sexier and more purposeful looking Vincent.

If anyone has more information about these great motorbikes, please feel free to email me at works.moto@gmail.com


Sunday, December 29, 2013

On The Bench - Norton Electra hubs

I've been slowly restoring a 1966 Norton electra for the past 2 1/2 years, and things are nearing the end. It's been a long and tedious process, and I'm definitely looking forward to the day that it's finished and back on the road. I won't go into too much detail as I'd like to save that for when the project is complete.

For the time being though, here's a quick shot of the hubs that I finally finished today. If you've been following along with the blog, you'll recognize a few of these pieces.


Pretty straight forward, as both hubs are standard for any Norton of the era. I found the cast aluminum scoop a while back, so that will get mounted on the brake plate for the front hub. I've got a pattern of vent holes, so I just need to drill those and then put everything together.

The spokes and spoke nipples are all finished now as well. The rims are in rough shape though. I had hoped to rechrome and restore them, but they're far too rusted and pitted, and just won't live up to the quality of the rest of the bike, so unfortunately, they'll have to be replaced.

The major things that are left on this project are to paint the tanks and then replace the rims and mount them onto the hubs, with a fresh set of tires. After that, it still needs to be wired up and then miscellaneous sundries purchased, like cables and fuel / oil line. That doesn't sound like much, but it'll still be several and surely lots of little bits that will pop up as it starts to come together.

Friday, December 27, 2013

Love, Speed and Loss - The Story of Kim Newcombe and the Konig

The amazing story of a privateer racer, turned motorcycle engineer, that took the Gran Prix motorcycle world by storm in the early 1970's. Kim Newcombe and the mighty Konig.


Watch the documentary here: Love, Speed and Loss

Norton Manx - Cutaway

I've always like the old cutaway illustrations like this. It gives a really great perspective on how everything goes together and how it all works. It seems that sometimes, things are a little bit off, but for the most part, they're quite accurate. This particular Manx is apparently from 1951, based on the date at the top. Surely, it's an early version as can be seen by the bolt up rear sub frame, flat front number plate, mesh flyscreen and swan neck clip ons. Just the sort of racing Norton that Geoff Duke would have used to win a World Championship.


Thursday, December 26, 2013

One Man's Dream - The John Britten Story

I'm not generally one for modern motorcycles. Anything newer than the 1960's, isn't really on my radar. But there are a few exceptions, and this is one of them. The Britten V1000.


If you're interested in motorcycles, and the heart inside your chest is still beating, then the John Britten story will surely move you.


To watch on YouTube: One Man's Dream - The John Britten Story

Ceandess / Wolverhampton - British Petrol & Oil Caps

I'll admit that, while I'm definitely not a parts hoarder, I do have a fondness to collecting these old petrol and oil caps. I don't feel too bad about having them here since it's not the sort of part that's keeping someone's bike off the road. And they're damn cool to look at, so I buy them anytime I see them cheap enough.


All these old British petrol and oil caps were made by Ceandess of Wolverhampton England, and they're stamped on the underside with that mark. They use a simple spring loaded inner seal and cork washer, so all you have to do is push down and turn in order to lock them onto the neck of the tank. Most of these also have a simple vent hole drilled into them as well.

There are lots of repop caps out there, and for as simple of a construction that they are, the repop caps just don't seem to work. I once had a repop gas cap come off in the middle of a ride.

These stamped caps were basically advertising / promotional pieces for petrol and oil companies back in the day. Other than the Norton "curly N" cap, they didn't tool anything specific to actually show their logo, but instead used a standard alphabetical stamping tool to forever emblazon their likeness into the caps. I personally think these stamped caps are quite cool, and very collectable.

Here's some close up photos of the few that I have. I'm sure there are countless other variations as well.

My favorite of all the caps I have, and this one adorns the Norton Atlas.


And this one for the Atlas oil tank.


Standard, smooth cap from a later model. This one being chrome plated steel.


It seems the earlier caps were brass, and then nickel plated. This one had the nickel coming off, which is quite common. I'm guessing that over the years, someone removed the nickel in order to get down to the brass.


The newest edition to the collection, and the only one I've ever seen with "London" stamped into it.


These caps are often found with some great looking original patina. A lot of them will have worn nickel plating around the vent hole where the petrol has eaten thru it. In some cases, I've even seen them where you could see the sides of the cap worn thru where it had been taken on and off thru the years, and someone's hands had worn down the nickel plating.


This is a very unique oil cap, in that it's much smaller than the standard 2" oil cal. The Norton Electra took a smaller 1 5/8" cap, and I happened to stumble across this one years ago.


The underside as seen in these photos. With and without the cork seal. You can see that over the years, they changed the position of the stamping around the inner cap.


Some of these caps also had a small loop with a chain affixed to it. The chain had two prongs at the end that provided tension. The prongs would go inside the tank and then the cap had enough free play on the chain to come off and hang to the side while you filled up. I never quite understood wanting to do that, as I don't have any desire for the cap to be flopping around and scratching up the paint on tank.


Some of these caps are on a few motorbikes here. Some are saved for bikes that I'd like to own at some point in the future, and the rest just sort of sit there looking good. All the spare caps sit on top of the nuts and bolts bin in the garage, and I enjoy seeing them any time I'm working at the bench.

Tuesday, December 24, 2013

Objects of Desire - Derek Minter / Steve Lancefield Manx Norton

There are machines that exist, that transcend being simple modes of transportation, or even being great racing motorcycles. There are machines that become objects of desire. This is one of those machines, that in my opinion, is not just of significant importance, but also of great beauty. I've been in love with the Manx Norton ever since I became interested in motorcycles, and it's that very machine that I fell in love with, and have become absolutely obsessed with. And although I have yet to have the pleasure of owning one, I've certainly been consumed by their presence, down to every obscure detail.

When you have such a beautiful machine, and one with such a rich history, they are all great. I certainly wouldn't turn my nose up at any Manx Norton, regardless of it's history or condition. But amongst these racing Nortons, there are a few that stand just a bit taller than the rest. A few that have achieved absolute greatness, with riders that were skilled and brave. In 1960, as the single cylinder Manx Norton was in it's last few years of manufacture, a young Derek Minter made history on the machine pictured here.


The historical significance was that, on this very machine, he lapped the Isle of Man TT course at a speed of just above 100mph. The very first time in history that a single cylinder had done so. Derek Minter went on to become a fierce racing competitor and earned the nickname "King of Brands", for his dominance racing at Brands Hatch. This Manx was set up and tuned by Steve Lancefield, who was apparently quite an eccentric man. He despised the term "tuner" and preferred to be seen as an engineer. Either way, the bike featured significant modifications at the hands of Lancefield, even for a machine that had already been developed by the factory for several decades. You can see that he lightened every possible bit of metal that he could spare. When weighed against a competitor, his bike came in at 11 pounds less than the Manx tuned by the very famous Francis Beart. A significant amount considering the competition.

It should be noted that Mike Hailwood achieved a 100mph lap of his own, in the same race. Hailwood started 20 seconds behind Minter, and while he managed the same achievement, it's Minter that's credited as the first to have done it.

But this post isn't about the details of history. It's about the simple fact that I love this bike. It's a combination of it simply being a Manx, it's stellar history and it's also just got something going for it that I can't quite put into words. It's strange in the sense that it's not very traditional for a Manx. The frame isn't black, the seat is cut down, it's got the short circuit tank on it, and the bottom yoke is a strange color. But all these little quirks, somehow add up and capture my attention and wonder.

Everyone has a bike like this in their head. One that you just can't stop thinking about. One that you long to someday own. And while there are others on my list, this is certainly up at the top. What's yours?

Monday, December 23, 2013

The most miserable piece of metal I've ever met

There were a lot of times during the process of restoring this Norton rear hub cover when I thought to myself "why even bother". This thing was literally junk. It had been heavily oxidized over the years, looked like it spent some time under water and had a couple of dents to top it all off. These things only cost about $20 to replace, but as stated before, I've got more time than money, so I'm always looking to restore parts rather than to replace them. There's a weird satisfaction to save and restore an original part, rather than just being lazy and buying a pattern replacement. Obviously not all parts can be replaced, and structural items as well as motor / gearbox wear and tear items, should be replaced. I don't restore old valves for instance.

But something this simple shouldn't be too hard, right? Wrong. This is literally the most miserable piece of metal I've ever met. After working out the dents, I sanded it more than probably any other piece of metal I've ever messed with. All the oxidation had pitted the metal substantially, and obviously it's quite thin, so you have to be careful and sort of massage it with fine grit paper. I worked on this piece off and on for at least 4 months now. I left it sitting on my desk during the process so that it was staring me in the face constantly and reminding me that I needed to finish it. The whole thing became a sort of task based on dumb pride and the refusal to be beaten into quitting.

The funny thing is, I never used these covers. I actually prefer the stripped down look of the stock Norton hub, without it's cover. But this piece is going on a Norton Electra that I'm restoring back to basically a stock set up. So the traditional look of this cover, is appropriate for the bike.

It sure wasn't fun, but it's done now. And in person, I think it looks even better than in this photo.


On The Bench - Amal Monobloc Velocity Stacks

These velocity stacks were actually given to me a while ago, and they were in about as rough of shape as one could imagine. The tips of them were ground down in places and there were gouges all around the inside and outside of them. It looks as if someone had been tightening them onto the carb, using channel locks. It makes me wonder what sort of owner would wrench on their bike in such a fashion. I know there are plenty of hack mechanics out there, and that these are old parts, but damn, I can't imagine you could treat something this rough.

My buddy put these in the his lathe and trimmed off the tips of them in order to remove the gouged sections, and also to shorten them slightly in order to have enough clearance for the tight fit on a Norton Atlas. Once the carbs are mounted, there's not a lot of room between the carb inlet, and the oil tank / battery box, so these were the perfect candidate to be trimmed down for this application. Without doing a bunch of work to these stacks, they were literally garbage, but I knew that I could likely save them.

Here's the before shot, after they had been cleaned and trimmed down on the lathe. I don't think this photo does justice to how poor their condition was.


I sanded out all of the gouges, or at least as many of them as could be removed, and then polished them inside and out. Obviously that's just a cosmetic thing, but now they look nice enough to go on the bike, once I get around to buying the carbs. They're certainly quite presentable, and saving these, sure beats throwing them away and replacing them.


A couple things to note; these are for 389 Amal monobloc carbs, which is the correct fitment for my Norton. These stacks aren't interchangeable with the 376 Amal monobloc, or the Amal concentric, so if you're looking for velocity stacks on eBay or something like that, please double check that they're the correct fitment. There are plenty of different versions that have been produced over the years. They come in different lengths and shapes. These are the straight type, but some have more of a bell shape, and some even come with mesh screens, which is a nice addition. The carbs on a Norton are so close together side by side, that I don't believe the bell shaped velocity stacks would have enough clearance. Wassell made and sold a lot of these as aftermarket parts, and they stamped some of them in order to make them easily identifiable. You'll see stampings like "389 / 2 1/4" which is of course for a 389 monobloc, and an overall length of 2 1/4".

Sunday, December 22, 2013

On The Bench - Norton Carb Spacers

It's the holiday season here at Solo, but time off from "real" work, doesn't mean I'm not doing work on the motorbikes. Quite the opposite really. As it's great to have a stretch of time to make some progress without the pesky interruption of my job getting in the way. The plan is to knock out all of the existing small projects over the course of the next 10 days.

First up is a set of standard Norton carburetor spacers for all Dominator and Atlas models. I'm looking to convert my Atlas back to twin carbs over the winter. And while finances will dictate wether that happens or not, I can at least prepare all the bits, so that if enough money gets saved up, and I purchase the carbs, everything will be ready to mount up.

I've enjoyed the single Amal MKII carb on my bike for countless years, and while it's not original, my main reason of keeping it on the bike, is the simple fact that I'm infatuated with the very rare Sonny Angel 2 into 1 cast aluminum manifold (more on that later). But I really would like a more traditional set up with the twin monobloc carburetors.

These spacers were found much like all the other parts I find; discarded and basically forgotten about. After shelling out $30, they showed up in the mail, and as expected, were filthy. They both were stripped of the rubber balance line, which got tossed in the trash. I pulled out the threaded fittings and everything got a wash in the sonic tank. After that, it was time to sand out decades of screwdriver gouges and who knows what else. This first photo is a side by side of one that's been finished and one that was clean, but not yet sanded or polished.


After about two days of carefully sanding and polishing, they were ready to be put back together. One major thing of note is the fact that one end of each manifold is slightly more squared off, and doesn't really follow the profile of the carb flange. Obviously, both left and right pieces were from the same casting, and you'd think someone at Norton would have had the smarts to face those two flats toward the inside. For one, you wouldn't see the flats, and more importantly, the inside studs are a very close mounting configuration, so having both flats facing in, would have made sense. But, the threads for the balance pipes would then be on opposite sides if mounted that way. And of course, that would simply look stupid. So, the only solution is to carefully sand the corners around the flats, and re-profile them to better match the carburetor flange. It's that simple task that takes the longest time. Most people wouldn't care, or even notice, but it's one of those things that would surely bug me every time I looked at it. So the extra time and work is well worth it.

Finished spacers both sanded and polished, and rubber fuel line with braided cotton jacket added to the balance tube. When mounted, the balance tube is in a U shape, and can be mounted either top or bottom to your choosing.


I can't stand hose clamps, so I refuse to use them. They're ugly and bulky, and simple don't look right. Since the balance hose doesn't need to come off, I use safety wire to keep them snug to their fittings. It does a great job and looks a whole lot better than hose clamps. It's also completely tucked out of the way and I think it's just a nice finishing touch.


On to the next project.

Lyta - Ask and You Shall Receive...

Well, after the post about the Lyta fuel tank, I received a great email from someone in Scandanavia who had purchased, not one, but two original Lyta tanks, back in the 1970's. Perhaps undecided as to which tank he liked more, he purchased both the standard 5 gallon Manx tank, as well as the 3 1/2 gallon short circuit tank. And while the tanks are not for sale, I was very grateful and excited to see photos that he was kind enough to send. I figured I'd share the photos here for everyone to enjoy.


You can see the differences of the tanks in the side by side comparison. Location of the petcock and cutaway for the carb, on the larger 5 gallon tank, would indeed suit a Manx Norton, while the short circuit tank seems more suitable for a road bike.

The quality and finish of these tanks looks impeccable, and the fact that they both still wear their original Lyta decals, is a thing of beauty.

Lastly, he also sent me an original Lyta advertisement, and judging by the simplistic fashion of it, I'd guess it to be from the 1960's. Back then, advertising was much more simple and straightforward. Of course there were far fewer companies making these specialty parts, so if you knew anything about motorbikes, you'd know of Lyta.


I imagine that the price of one of these tanks today would cost about a $1000, perhaps even a bit more. It's really great that so many people around the world, stumble across these posts, and even better when they're kind enough to share photos and information. He must really love his machines, and it's a real testament to know that he had the foresight to buy both tanks, and has kept them this long. My hat's off to you sir. Thank you very much for sharing.

Monday, December 16, 2013

The Devil is in the Details

Stainless bolts that hold the the tach bracket together. Nobody wants to see the lettering on the bolt heads, and since they're front and center, they definitely needed to be tended to. It took me longer to drive over to my buddies house to put these on the lathe, than it did to have them faced off, but it's well worth the effort, and it's a good excuse to hang out with a good friend. You always know you've got a good friend when they'll help you out with even the smallest of tasks. Thanks Bob, I owe you.


Wednesday, December 11, 2013

Lyta - Norton Short Circuit Petrol Tank

Infamous, yet illusive - sought after, yet impossible to find - extremely rare, yet well known...

It amazes me as to how popular the Lyta petrol tank is, yet you'll almost never see one, yet alone find one for sale. And trust me, I've been looking. To my eyes, this tank is pure beauty. It's curvaceous, but built for a very simple function. How can something perform such a simple task, yet look so stunning while doing so? I suppose that at the end of the day, the petrol tank on any motorbike is sort of the crowning jewel. It'll likely be the first thing you notice when looking at any vintage bike, so it's importance is not just in it's function, but in it's presence.

The photo below is one that I've saved for a while now, and it's originally from a Bonham's auction from several years ago. I don't recall the exact selling price, but it was reasonable. Three hundred dollars or so. If only I would have known it was for sale...


It's known as the "short circuit" tank. Named simply after it's function, of being a smaller petrol tank for shorter circuits that didn't require the larger / original 5 gallon tank. It holds 3 1/2 gallons, and was almost always fitted to Manx Nortons, or wideline featherbed Dominators. And while it doesn't look like this tank, Lyta also infamously made a tank for the BSA Goldstar.

The funny thing about all this, is that you'll definitely see "copies" of this tank for sale, on ebay and other sites, almost any day of the week. I use the quotation marks because while they're always listed as replica Lyta tanks, they bare little, to no resemblance to the real thing. I suppose that's to be expected, since I can't imagine that many people have an original tank to actually replicate from. Perhaps to the untrained eye, it's the same, but in reality, it sure isn't. The lines on all the copies, are always wrong, the proportions wrong and almost always, the filler cap is on the incorrect side. How someone could get that detail wrong, is beyond me. Maybe I'm too picky. Maybe I'm some purist snob. Maybe in reality, an alloy fuel tank, is just an alloy fuel tank. Maybe the details don't matter much. Maybe if it holds 3 1/2 gallons of fuel like the original, that's good enough. And hey, you can always buy one of the reproduction Lyta tank decals on ebay UK for about ten bucks.

All things considered, I'd personally rather have nothing, than something that's fake. To me, it's pointless. I suppose these replica tanks serve a vital purpose, because in reality, there's not enough of these real tanks, for everyone that wants one, to actually have one.

So here's just a fairly useless post to highlight one of the most beautiful petrol tanks in history. Or, at least that's my opinion. If anyone out there, happens to stumble across this post, and you've got one of these original tanks, please contact me. I've got a Norton project sitting here in need of one. I'd gladly pay a fair price. Or even if you have one, and it's not for sale, I'd love to just get some information about the details of the tank. I'd love to see more photos and learn more about it.

It's a long shot, I know. But you never know. So, my email is works.moto@gmail.com


Sunday, December 8, 2013

Road to Nowhere

This is the point in time where you realize that winter is here to stay. I'll brave the cold and get out for a ride even when the weather is down in the 30's. It's a different kind of fun than just the pure enjoyment of nice weather riding. It's more like a dumb badge of courage or something. But when it gets like this, you know it's a wrap.


RIP 2013 riding season

Saturday, December 7, 2013

J.V. Special - The two Tritons that may have started it all

I've got mixed feelings on this post, but history cannot be denied. I despise Tritons. They make no sense to me, but I acknowledge their place in the annals of history. There are some false perceptions about the origins of the Triton, which date back to the early 50's when the Manx Norton dominated Gran Prix racing. At the time, Norton wouldn't sell Manx motors separately, and there was some demand for the motors in 500cc Formula racing cars. So, there were some racers that were forced to buy complete Manx Nortons, and then remove the motor for use in their racing cars. Therefore creating discarded complete Manx chassis'. So legend has it that guys started buying up these discarded frames and fitting pre-unit Triumph motors into them. But this is where I believe that the facts of history are incorrect. The question is simple: How many Tritons have you seen, from the period, that were built into Manx frames? The answer is simple - not many. Nearly every original Triton I've ever seen, was built using the road going featherbed frame. But the 2 motorbikes featured in this post, are different, in that they are completely original and were indeed built into Manx frames.

The story apparently starts when, for some unknown reason, Norton refused to sell motorcycles to a man named John Vickers. At some point, he acquired 2 Manx Nortons, or at least their complete chassis', and fitted them with Triumph motors. One being a 500cc, and the other a 650cc. These frames are apparently from 1953, but I'll admit that I know very little about Triumph motors, so I won't dare speak about when these motors are from. Presumably from that same general time period.

The origins of the Triton will always be in debate. The fact is, probably nobody knows. Dave Degens, of Dresda Motors, is often credited with inventing the Triton, but even he's told the story of the first one that he had seen. Recent information seems to point at these JV Specials possibly being the very first of their kind.

This first photo is from a fairly recent motorcycle magazine (I can't recall which magazine or which issue).


And these photos show both bikes at a show in the UK, where they were nicely displayed for all to enjoy. Both bikes appear to have Amal GP carburetors, with the early round type remote float. The longer / slimmer alloy canisters, appear to be chain oilers for the exposed primary.


Interesting to see that John Vickers kept the original Manx paint motif, but changed the black stripe to a blue stripe. And badged each tank with his initials, and the word "Special" underneath them. Forever painting his likeness into a very interesting bit of motorcycle history. That's the kind of thing you can't really get away with these days. Although there are plenty of custom builders rebadging bikes today, I just don't think it's quite the same thing as being the first to start a trend that would be popular 70 years on.


The early 50's Manx Nortons had quite a flat front number plate which was made of metal, and a mesh flyscreen, In this photo, you can see the original Manx swan neck clip ons, as well as the upper fork shroud cutouts to accommodate the short / manx length forks.


All the typical early featherbed Manx features - twin leading shoe magnesium front brake, early type upright rear shocks and conical Manx rear hub. I bet the open meggas sound quite nice, and they damn sure look good painted black.

The best thing about these machines is that they're now in the hands of an owner that's smart enough to appreciate their original patina. Countless bikes get dragged out of sheds for the first time in decades, only to be restored or even worse, over-restored. Thankful for all of us that these 2 important machines haven't suffered the same fate. And it's nice to see that he still brings them out for the public to see, and apparently even runs them from time to time.

The story is that the 500cc machine ran at the Isle of Man TT, but I've yet to be able to confirm when that happened, or what result it garnered. The 650cc machine wouldn't have been eligible at the TT, but apparently competed in other road racing events around the UK and Europe. At some point in the late 1950's they were tucked away in a shed, and sat dormant for 50 years or so.


I'll admit that these bikes are absolutely stunning. But I'll also state that what I find beautiful about them, is all the Norton bits. I could care less about the Triumph motors, but I fully acknowledge the importance of these machines. John Vickers must have been an interesting guy. Or maybe he was just lucky and had no idea what he had started. One thing is for sure, anyone building a Triton, should take a close look at these and follow suite. The world certainly doesn't need another slimline featherbed with a Triumph unit motor.

Friday, November 29, 2013

More Time than Money

As the title of the post states, I've got more time than money. So when it comes to things like rebuilding wheels, I opt to do the work myself, rather than sending them off. Admittedly, it's a lot of work, and the type of work is boring and labor intensive. Front and rear wheels get disassembled, cleaned and then polished. I think we all know the drill by now, and I'm not talking about the aluminum hubs, or the brake plates, so I'll leave that for another post altogether. But the spokes and rims need to be rebuilt and since the weather is terrible, it was time to sit inside and and give them the attention that they need. 40 spokes per wheel and of course all the spoke nipples that go with them. The wheels came apart fairly easy, and seem as if they've never been apart. None of the spokes where bent, none of the threads were messed up and nobody had chewed up the spoke nipples using improper tools.

Once everything was take apart, I grouped all the spokes into sets of ten, based on their position on the hub, then started to clean them. Basically, without getting too long winded, it's 80 spokes and 80 spoke nipples that all need to be cleaned and then polished. The photo below, basically shows the current state of progress. And this photo probably doesn't do justice in showing how heavily oxidized and dirty they all are, nor does it show how nice they look once cleaned and polished. I'm not quite half way there, but I'm pacing myself and doing about 1 set per day. All in all, each set takes about an hour, so once they're complete, it'll be about 8 hours total labor, and then perhaps another hour or so for the spoke nipples.


Lots of guys complain about the $100 price tag per wheel to have someone like Buchanan's drill, lace and true your wheel. But in all honesty, I think that's quite a fair price considering the quality of work they do. And if you're the type of guy that doesn't want to do the work, or simply don't have time, then that's what it's going to cost. I've had plenty of wheels built by Buchanan's in the past, and I've always been happy with the work. In this case, I didn't need to have a rim drilled, so cleaning and re-lacing is just a simple matter of doing the actual work. In the end, I'll save almost $300, between the cost of lacing each wheel and shipping to and from.

Another point is that in the past, I had built wheels from just a hub, so I had to buy spokes and rims. But for these wheels, I have those bits, so it didn't make sense to replace something that could simply be restored. The rims are another story and they'll need to be either re-chromed or replaced.

It's slow work, but in the end, it's satisfying. They'll be on the bike for a long time to come, and anytime I can save and restore these old bits, it surely beats replacing them.

Monday, November 25, 2013

Special - Kennedy / Lyster Norton

Back when the term "cafe racer" was considered derogatory by those it meant to classify, the bikes that these guys built were referred to as "Specials". And while the vast majority of these Specials were home built machines, a few of them were also being built by cottage industry pioneers. Of those, the most famous would of course be Paul Dunstall and John Tickle. But there were other smaller firms turning out rather incredible machines as well. The following photo is quite famous, but very little is known about the bike that's pictured.


Motor and gearbox are form a Norton Dominator. I'm quite sure that it's a 650ss, and this bike is fabled to have all the period hop up parts. It's some sort of collaboration between Ian Kennedy and Colin Lyster. Ian Kennedy was well known in the day for his cast aluminum top yokes, and you can clearly see in the photo, that the motor is adorned with his valve covers. Of which, I've only ever seen 1 other set. Colin Lyster is well known for the twin disc brake set up featured on this bike. The rest of the machine is really a mystery to me. Frame and swingarm are completely custom, body work is very typical of the period, but surely made to suit this bike. The front end looks to be Ceriani GP, and the rear hub is from a standard Dominator. The Amal concentric carbs indicate that this would have been the late 1960's, but I'm unsure as to the exact year.

The bottom line is that this is a damn cool bike and I'd love to learn more about it. Based on the fact that the rider in the photo is tightening the steering damper, he's surely about to head off on a spirited ride.

Thursday, November 21, 2013

Kick Start Only, No Flip Flops...

Many years ago, and good friend and I shared a garage space. We kept our bikes there, road together, wrenched together and often times left random notes to each other about some miscellaneous task or reminder.

At the time, I had a bike that I was selling, and posted it on Craigslist. Likely due to the $800 asking price, random people kept showing up interested in buying it. We all know the Craigslist process of dealing with people that show up, and that uncomfortable feeling of letting some perfect stranger test ride your bike. I've never been one to care much, figuring that if I'm selling it, someone is going to want to test it out. And in this case, it's $800, so what the Hell could it even matter.

Well, one guy shows up this afternoon with his buddy to have a look at the bike. He's in shorts and flip flops, and just has that nervous look where you simply know that this guy has never ridden anything before. But I'm up for a laugh, so I told him he could have a go at it. Watching this guy try and kick start the bike in flip flops was easily one of the funniest things I've ever seen. Of course there's an art to kick starting any bike, and each one has it's own personality. Even a season rider could have trouble starting another man's bike. So here's this guy, with no real clue how to get the feel for kick starting it, and over and over again, he's giving it everything he's got. His flip flops kept getting folded over and caught up on the kick starter. Sheer comedy, and it took everything I had, not to start laughing. Eventually he got it to fire and off he went on his awkward test ride. Surely in pain, and now having to shift with the bare top of his foot. I'm not quite sure what he was thinking.

After all was settled, he and his friend left, and I jokingly told my garage mate of the story. We laughed and that was sort of the end of it. A couple days go by, and I find a note in the garage that my buddy left. It simply read "Kick Start Only, No Flip Flops..."

Out of sheer humor, I revised the Craigslist add to include that statement. Purely for my own amusement. I wish I would have kept that note. I'm sure it got thrown in the trash, but the memory of it lives on, and every once in a while, one of us will randomly text that to the other. Definitely good for a laugh.


The guy with the flip flops came back a week or so later and bought the bike. He had shoes on. I wonder what happened to him.

Wednesday, November 20, 2013

Norton Domiracer

The Norton Domiracer is a rare motorcycle, of which, very few were ever made. At first glance, it would appear to be a fairly standard Dominator motor with some performance parts added for racing. But, in reality, it's a very different motor altogether. This particular bike being very unique in that the Domiracer was mainly known to be mounted in the newly developed Lowboy frame. It was supposed to be the evolutionary racing machine to replace the Manx Norton. Intended to be a less expensive machine to manufacture, while the parallel twin Dominator had been in development / production for roughly 12 years. So as a foundation, it was surely far enough along to be highly tuned as a race bike. Strangely though, the Dominator was a pushrod motor versus the DOHC Manx. A somewhat step backwards for the highly tuned Manx Norton.

I came across this photo thru a good friend, and strangely, I had simply never seen it before. It's a 1962 full spec Manx Norton chassis, with a genuine Domiracer motor. Opinions seem to vary as to how many real Domiracer motors were ever made. Some quote the number to simply be 1 example, but I've heard that up to 5 may have originally existed. You can see all the standard Manx features for 1962, including the 4 leading shoe front brake, conical rear hub, dropped top yoke, exposed spring front suspension, Smiths ATRC tachometer, central oil tank and Works petrol tank.


You can also very clearly see the eccentric rocker spindles in the photo, with oil banjos that go directly into the spindle, to lubricate the valve gear. Also noticeable is the Lucas 3MTT magneto, and right & left handed Amal GP carbs, with the 2" inlet tract. The oil tank hangs from brackets in the frame, and instead of having an oil tank table mounted to the engine plates, it had an angled bracket affixed to the cross tube, with a simple foam pad, and rubber bands that held the tank back against the bracket. And while this machine certainly resembles the production Dominator of the era, I can see only a few features which were shared with the production line. Insignificant things such as the timing cover and valve covers look to be standard, while other things such as the engine brackets are clearly different.

As an update to this original post, I wanted to show the other side of this bike. I stumbled across this photo, and I think it helps t complete the story to see the other side of the bike.


In this photo, you can see some other interesting features, such as the camshaft breather coming out of the side of the crankcase rather than the rear. This was a feature that was later added as standard to all Atlas machines. Also can be seen, is a Manx primary chain oiler, special bracket around the top tube of the frame to hold the large Amal round remote float and also an interesting cut out to the brake plate on the rear wheel.

It's not too often that I come across such photos and have never seen them before, so I'll admit that I've looked fondly at the photos, and tried to imagine what happened to the bike. Certainly, I have no idea, but hopefully it's sitting safely tucked away somewhere, and might see the light of day again soon.

UPDATE:

I wanted to make a revision to what I wrote above. I was corrected by a good friend that knows more about the Domiracer than I do. I mis-spoke about the camshaft breather being like the one used on the Atlas. The banjo fitting in this motor, is actually a high pressure oil feed that lubricates the needle roller bearings in the camshaft. I think it's important to call out this information and correct. My apologies if anyone was misled.

If anyone has information that corrects anything that I post here, please leave a comment or email me. I'm always open minded to make corrections and ensure that the information being shared online is accurate and correct. Thank you to Benjamin for the correcting my error.


Monday, November 18, 2013

Shrine

Every garage has at least one...
It's always just some random shelf or cabinet that's stacked with random bits. Giblets, I call them. It's almost never anything too serious, but somehow it's one of the most intriguing fixtures, and always draws my attention. It's like it's some sort of shrine, or parts graveyard. Piled high with discarded, unused and often broken parts. Little things that people collect and acquire along the way. If you've been involved with motorcycles for any length of time, you'll amass a collection as well. I don't think any of it is intentional, each item just seems to end up there because there's no other place for it. We can't throw anything away either. Even broken bits of motorcycle garbage, are kept and become this strange form of garage art.

Somehow I've ended up with two or three shelves that look like this. On top of the parts bin above the work bench, a storage cabinet in the garage and even a wall shelf in the house. I've seen them with signs marked "Gifts to the God's of Speed", but mostly it's insignificant items or collectibles. It makes me feel good though. To sort of surround yourself with these things, evoking the memory of some point in time. I guess the main thing would be to not let it get out of control.